1999-05 SATURN L-SERIES |
||||||||||||||||||||||||||||||
|
1. Pry wooden trim piece off with a flat head screwdriver. |
|
|
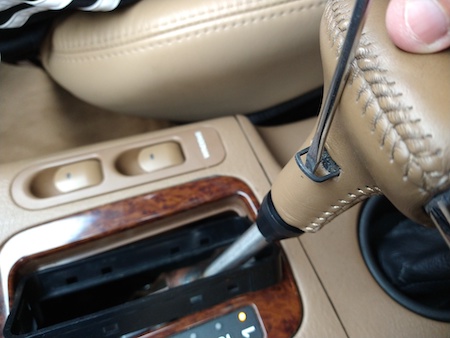
2. Take shift knob off - pry out the staple holding it in. |
 |
|
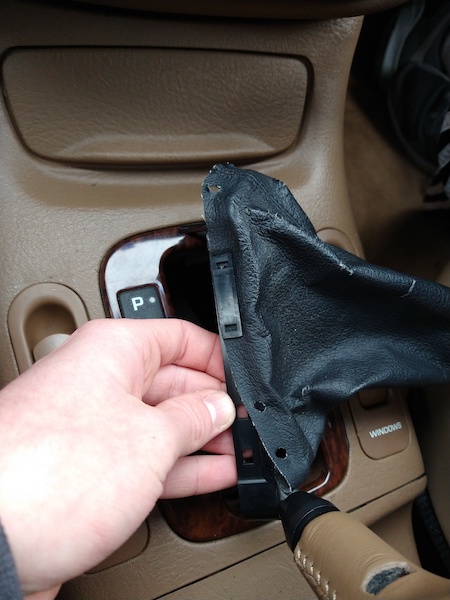
3. Take off black plastic around the inside of the wooden trim piece. |
 |
|
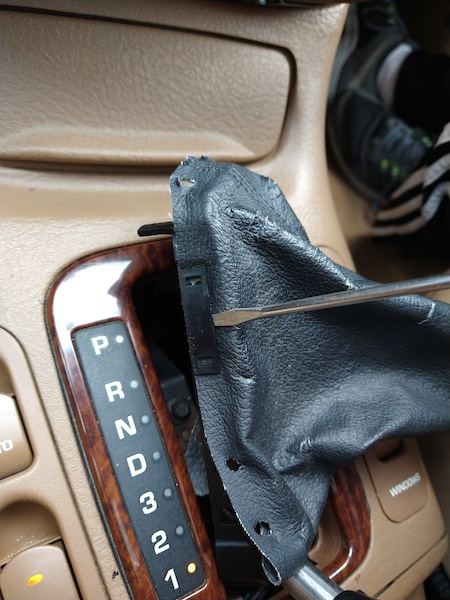
4. Pry off black pieces holding the boot on. |
 |
|
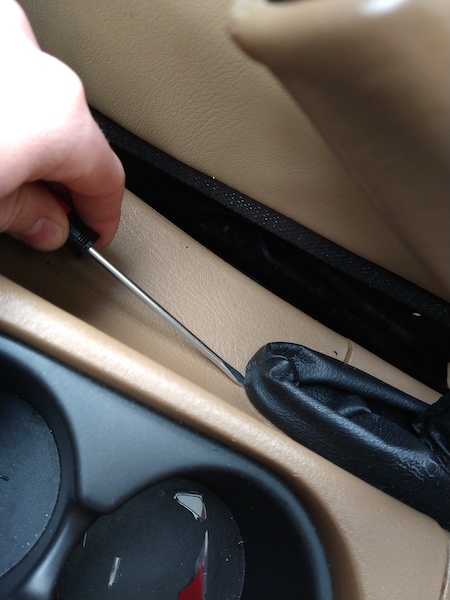
5. Pry black trim ring off at the bottom of the e brake |
 |
|
6. Slide boot and trim piece off. |
|
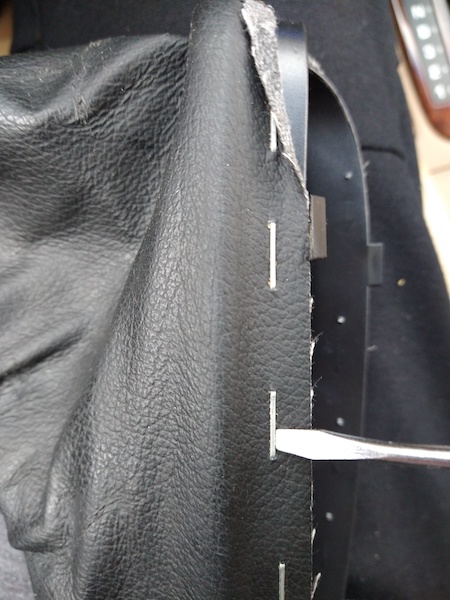
7. Remove all of the staples holding the boot in. |
 |
|
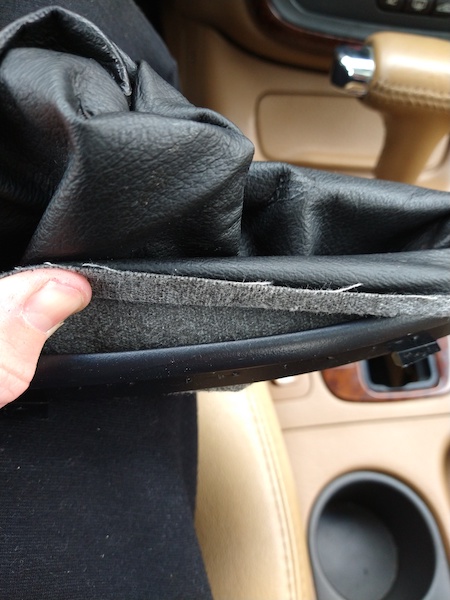
8. Remove black trim ring from the boot. |
 |
|
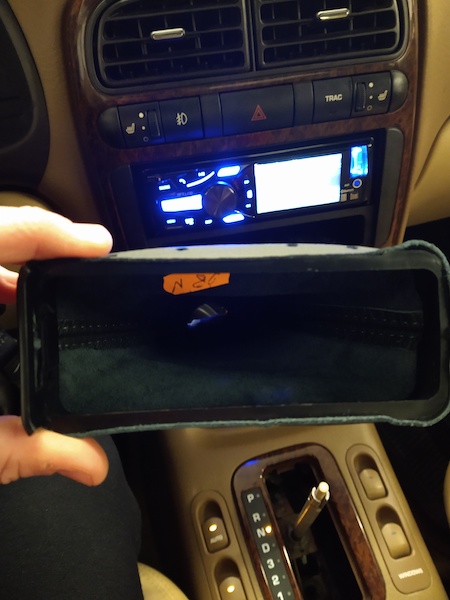
9. Put black trim ring in the boot and use the clips to hold it on. |
 |
|
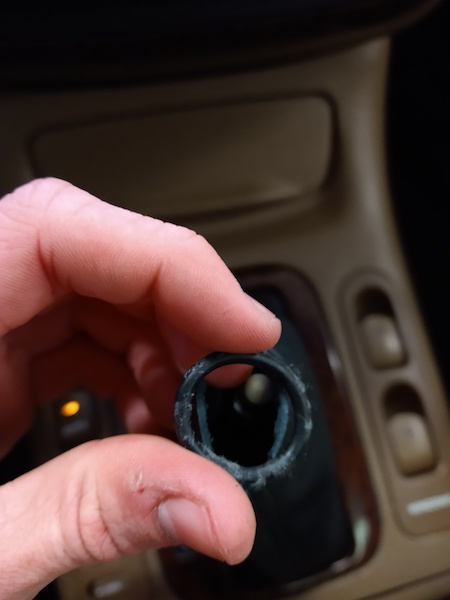
10. Put rubber band on the top of the boot on the inside and fold the fabric down. |
 |
|
11. Put shift knob back on and snap the whole piece back onto the console. |
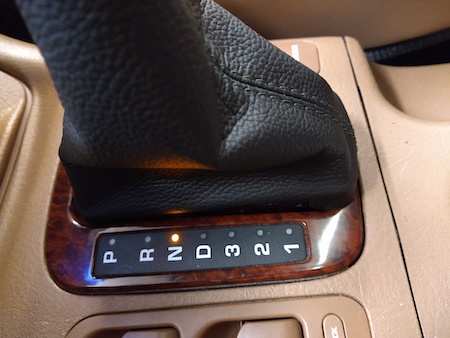 |
12. Staple boot to black trim ring. |
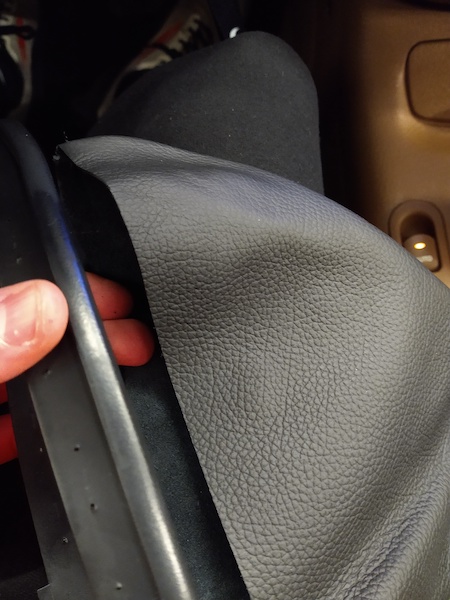 |
13. If you do not have a stapler, you can use any epoxy-based glue (3M Super 77, Automotive GOOP or similar). |
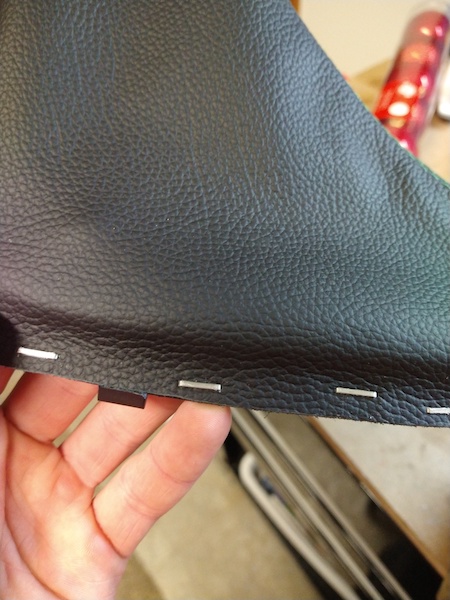 |
14. Slide boot and trim piece over the e brake and snap the trim piece on. |
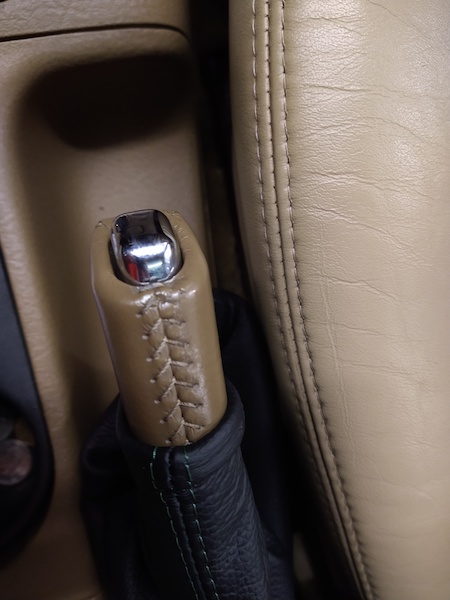 |
|
CONGRATULATIONS - YOU HAVE SUCCESSFULLY INSTALLED YOUR NEW LEATHER BOOTS!
Useful tip You have installed a product made out of genuine leather. As you know, to maintain a leather product in good condition, you should take care of it. We suggest occasionally (every 4-6 week for example) applying some leather conditioner/UV protector to keep your leather from drying up in the sun and cracking. |
|
Please subscribe to our newsletter.
Get an instant 20% discount and enter our montly $100 CASH sweepstakes!