2015-24 MINI COOPER |
||||||||||||||||||||||||||||||||||||||||||||
|
For automatic - click this link: MINI 2015+ automatic shift boot installation. |
|
|
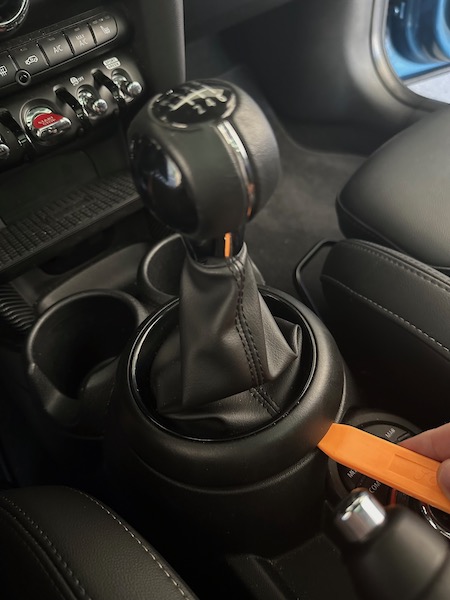
1. To remove the shift boot assembly simply use a pry tool and lift the boot up. |
 |
|
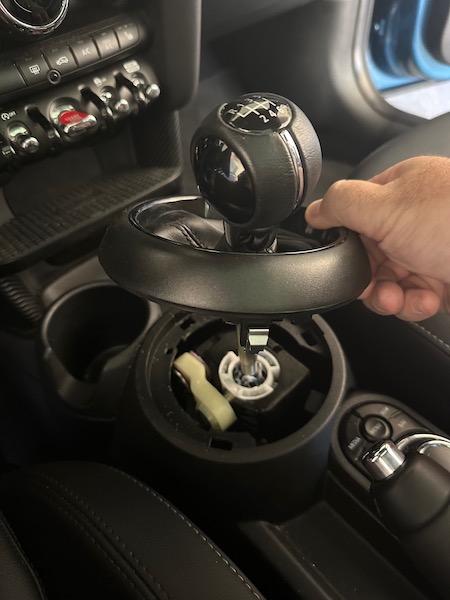
2. Once you lift it up, you can see the shaft. You need to make sure not to twist this shaft when you are trying to remove the shift knob |
 |
|
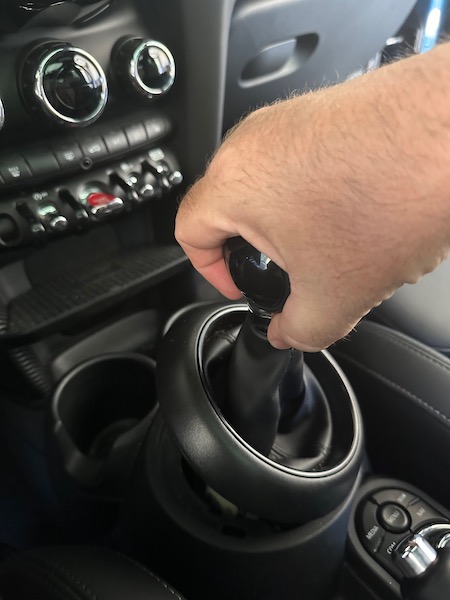
3. You will have to pull very strongly upward on the shift knob to get it to release. The complete assembly will come up. |
 |
|
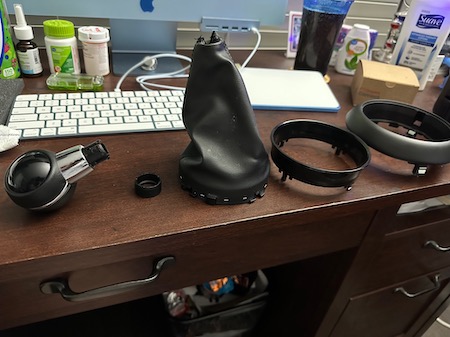
4. Separate the particular piece of the shift boot assembly. |
 |
|
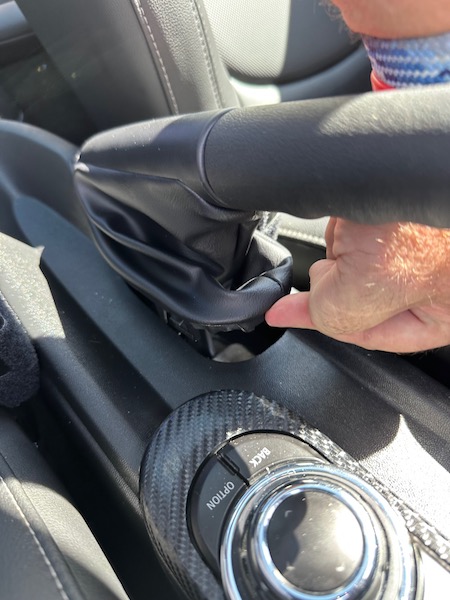
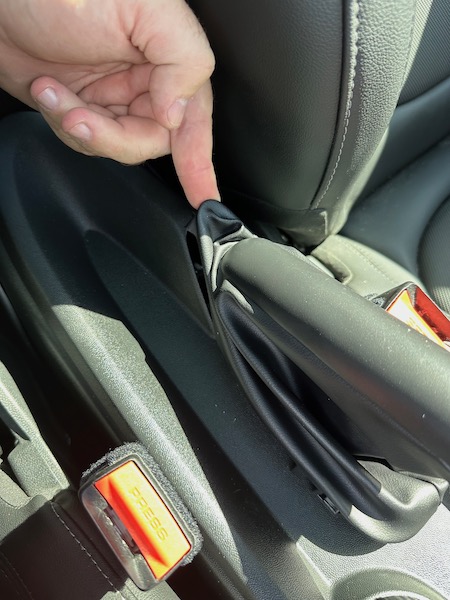
5. To remove the e-brake boot there are clips in the front and the rear. |
 |
|
6. They can be lifted with fingers or a pry tool to separate from the center console trim. |
 |
|
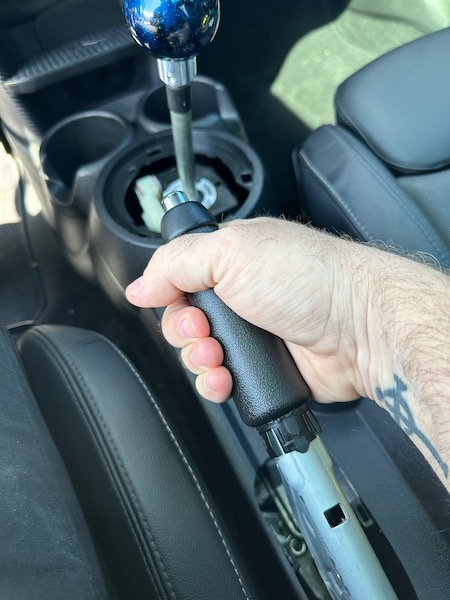
7. Then you have to remove the ebrake handle by pulling it towards the front of the car, it will be very difficult and take some time. |
 |
|
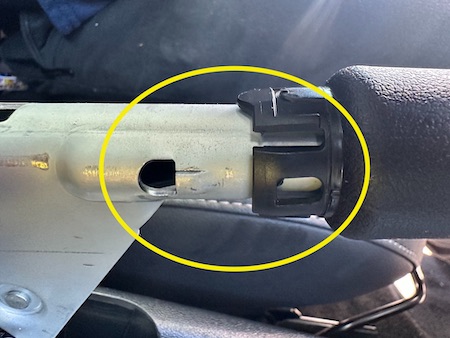
8. You are trying to release the 2 clips on other side of the handle (see circled image) so you may have to wiggle it left and right a bit to get it to release. |
 |
|
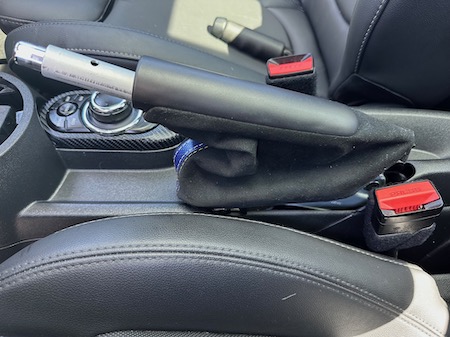
9. Transfer the ebrake trim to the new boot. The old boot is sandwiched between the inside part of the trim and the visible outside part. The two come together by clips. Look inside the hole on the ebrake boot to see clips that hold them together. You can release those clips by sliding a small screwdriver inside the hole and pressing on them. Once you release the clips, the two plastic parts come apart and you can remove the old boot from them. Put them on the new boot using the same principle. |
 |
|
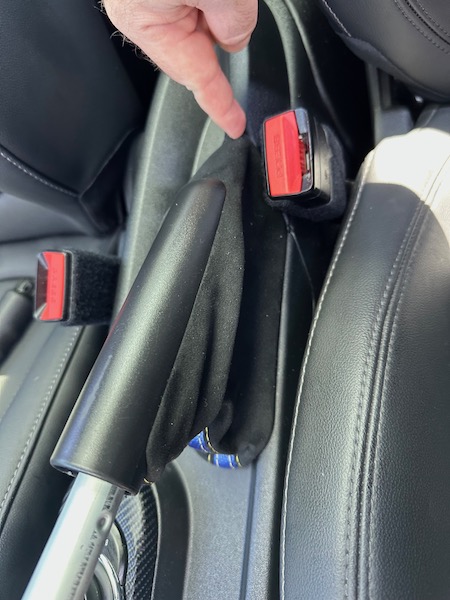
10. To install the new ebrake boot just slide it in place over the assembly and you need to clip it down. |
 |
|
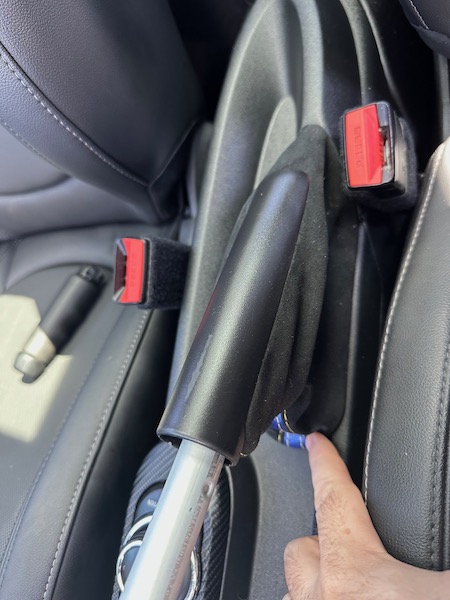
11. The front and rear clips will adhere it to the center console. |
 |
|
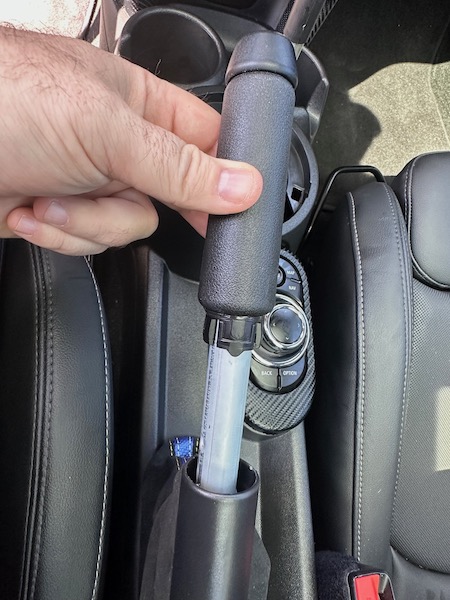
12. Re-install the ebrake handle. |
 |
|
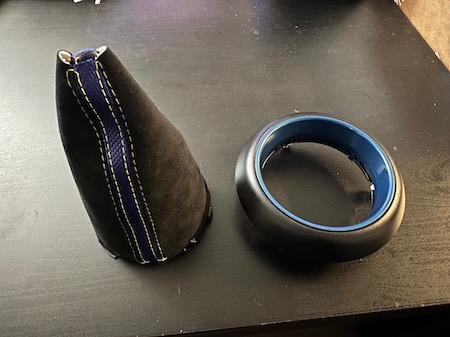
13. Remove the plastic bracket from inside the factory boot and glue it (or staple it) into the new boot. Make sure you align the boot on the bracket correctly - see points 14-17 below for guidance on how the plastic bracket fits into the assembly. |
 |
|
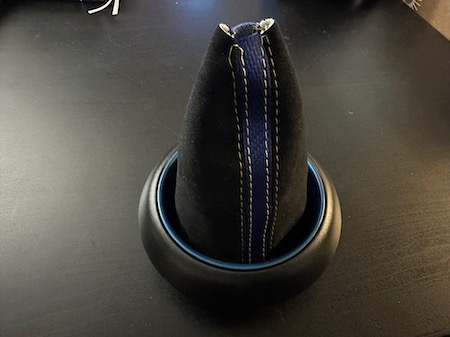
14. Insert the new boot into the outer trim ring and slide it down till it clicks into place but to make sure you align it correctly you will see several tabs. |
 |
|
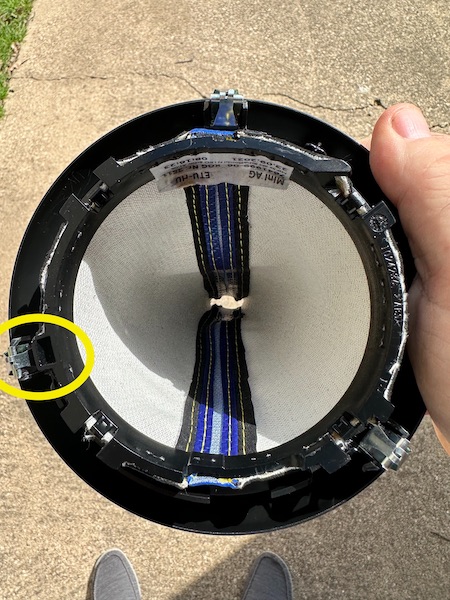
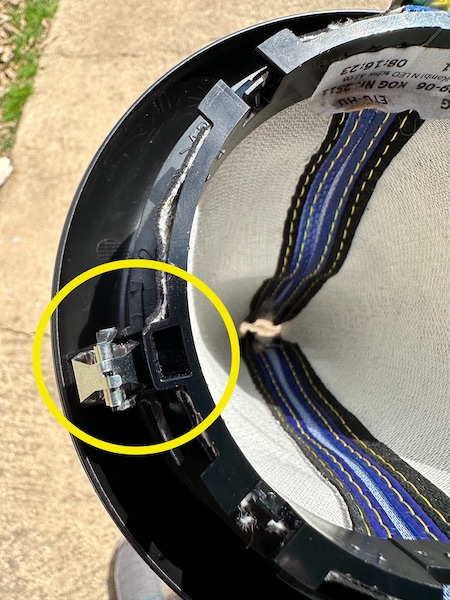
15. There is a square one that needs to line up with one of the trim clips. |
 |
|
16. Close-up of the alignment that's required for correct re-assembly. |
 |
|
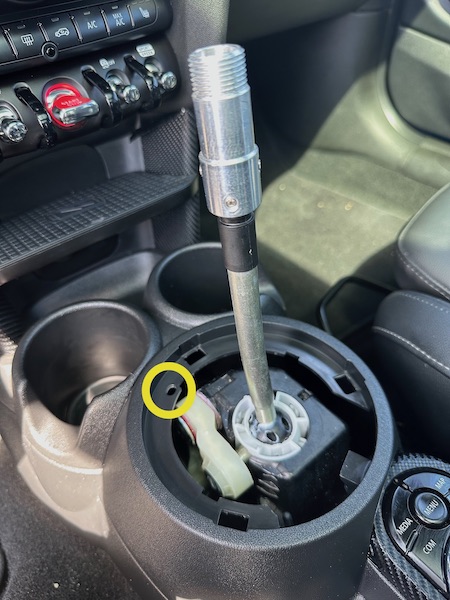
17. Secondly you will need to line up the trim assembly with the center console. |
 |
|
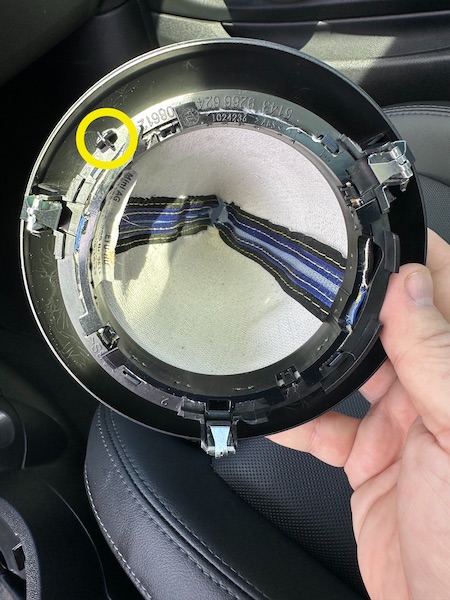
18. You will see a tab on the trim piece that lines up with a hole in the center console. |
 |
|
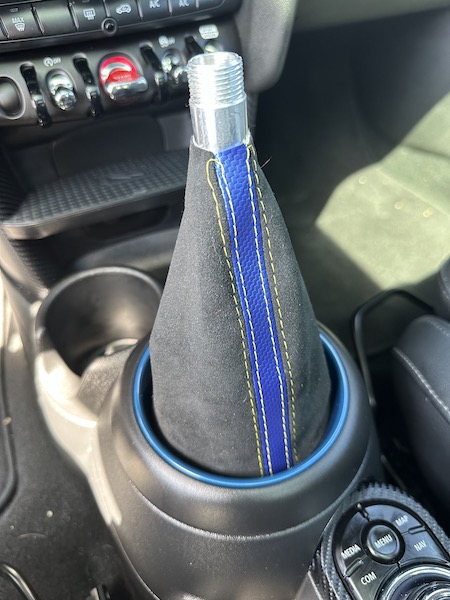
19. Clip the boot into the center console and proceed to reinstall the shift knob. This picture shows an aftermarket shifter adapter hence the screw threads not present on factory shifter. |
 |
|
ENJOY YOUR NEW LEATHER BOOTS! |
|
|
Useful tip You have installed a product made out of genuine leather. As you know, to maintain a leather product in good condition, you should take care of it. We suggest occasionally (every 4-6 week for example) applying some leather conditioner/UV protector to keep your leather from drying up in the sun and cracking. |
|
Please subscribe to our newsletter.
Get an instant 20% discount and enter our montly $100 CASH sweepstakes!